NI Package Builder
The NI Package Builder is another tool on top of NI Package Manager providing easier accessibilty to creating nipkg files (and compiling feed contents). It is worth noting that there is a 32- and a 64 bit version. Difference in bitness has subtle effects on the output files.
The following descriptions are bitness-agnostic, differences between the versions will be pointed out seperately.
Solution files
NIPB uses so called solution files (*.pbs) to store configuration data for the package(s) to be build. Correctly used, they offer a productivity boost. All following examples are use a .pbs file.
Building a nipkg based on files to be copied to specific folders on the target
Prerequisites: nipkg payload exists as distributable files accessible from the machine, NIPB is running on.
- Locate the Packages pane on the top right of the NIPB UI. Add a new package using the appropriate button. Assign an appropriate name.

- Note that on the bottom right part of the NIPB UI, the Property pane populates with the information of the item under focus. Fill in information in the Property pane as required

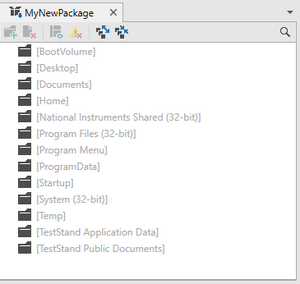
- In the centre of the NIPB UI, a tab with a standard folder structure appears.

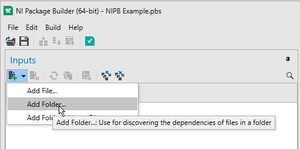
- Locate input pane on the left side of the NIPB UI. Use button to open the dialog.

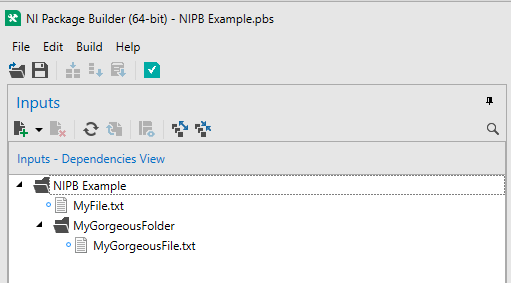
- Add files / folders as needed using the Input pane on the left side of the NIPB UI

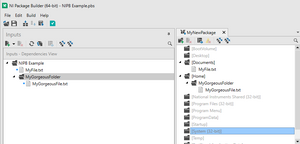
- Assign source files to specific locations on target machine via Drag and Drop into the folder structure of the package. The available folders are the so called Target Root Directories (Reference to https://www.ni.com/docs/en-US/bundle/ni-package-builder/page/targetrootdirectories.html). Note that depending on the bitness setting of your package, you will only have [Program Files (32Bit)] available.

- If you need your files to go in a different location than the Target Root Directories, you can add a custom sub folder structure. Please also note the following section Target Folder Considerations (to be added)

- Upon having finished the file assignments, the package is ready to be build. Build can be initiated by using the application menu

the button on the packages pane

or pressing Ctrl+F6
If you haven't previuosly saved the active configuration, NIPM will kindly prompt you to do so.
Package build result
Browse to the build output directory for your packacge.

Note that the output diretory contains a nipkg file and a folder. The nipkg is just an archive file of the folder located alongside.
Target folder considerations
To be added
