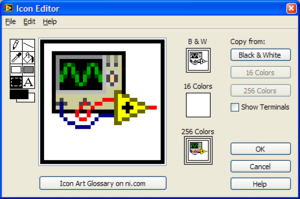
Icon Editor (LabVIEW 8.6 and Earlier)
Appearance

| |
This article is a stub. You can help LabVIEW Wiki by expanding it. Please improve this article if you can. |
| |
This article or section needs to be updated. Some information on it may be out of date, and should not be relied on. Please improve this article if you can. |
The Icon Editor...
Usage
Best practice
Tips and tricks

- Double-click the Text tool to quickly access the Text Tool Settings in the Icon Editor Properties dialog.
- Use font Small Fonts with size 8 for readable icon text.
- Double-click the Select tool to select all layers of an icon (this is a fast way to delete the default icon).
- Double-click the Rectangle tool to draw a rectangle of the size of the icon.
- Double-click the Filled Rectangle tool to draw a filled rectangle of the size of the icon.
- Press Ctrl to temporarily switch to the Dropper tool for the front color.
- Press Ctrl+Shift to temporarily switch to the Dropper tool for the back color.
- Use the arrow keys to move layers pixel-by-pixel.
- Leave empty space around an icon to draw a smaller icon.
- Drag an image over a VI icon on the front panel or block diagram to use the image as icon.
- Copy the icon of an existing VI or function from the block diagram into the Icon Editor with Ctrl+C and Ctrl+V.
- Use the Select tool to select a target area before pasting data from the clipboard to automatically fit the content inside the selected area (will size to fit).
